Features:
Basic Information |
|||
| Model No. | Installation | Material | Warranty |
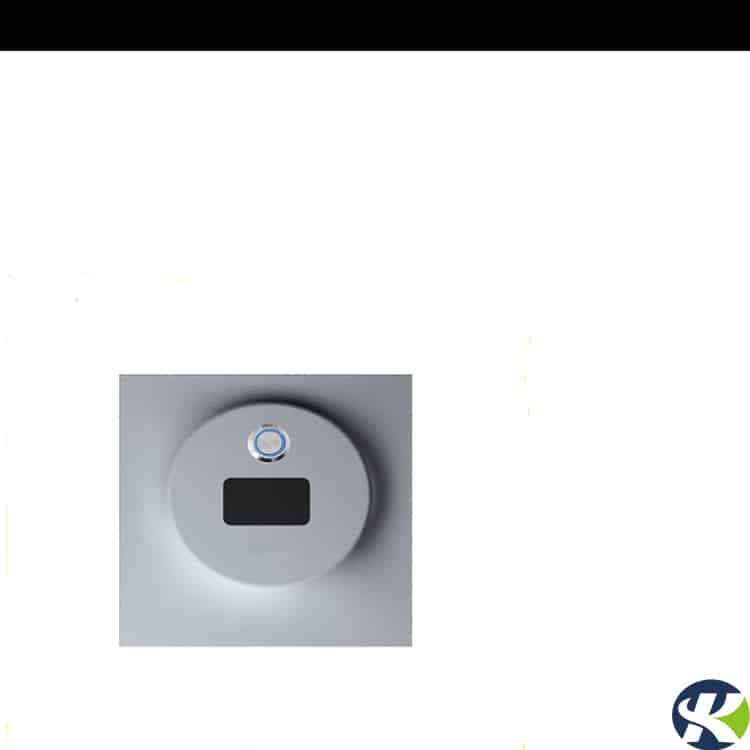
| KEG-20-S201AD | Concealed installation | brass valve/stainless steel plate | One year |
Technical Specification |
|||
| Working power | Flush duration (Normal mode) | Working water pressure | Sensor range |
| DC6V & AC220V | Pre-flush 2s;after-flush 6s | 0.05-0.7MPA(7.25-101.5PSI) | 350-1000mm(adjustable) |
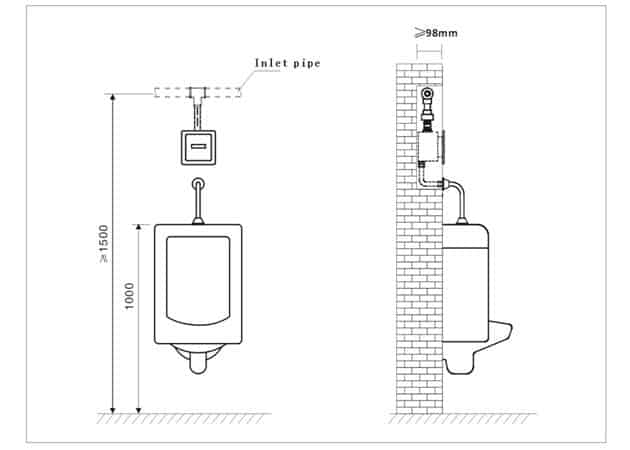
How to install automatic urinal flush?
STEP1
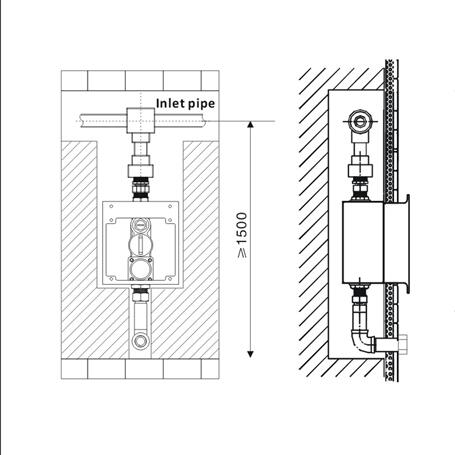
Dig a suitable hole on the wall according to the installation instruction. Inter control box into the wall and connect the inlet pipe and outlet pipe. Open the stop-valve to ensure all the connectors are watertight.
Notice:
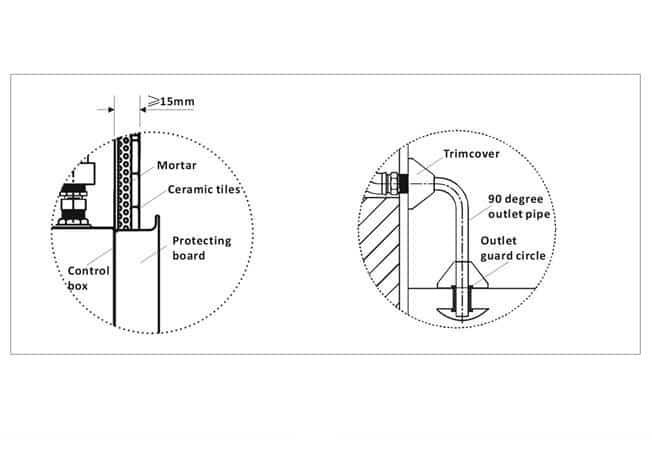
The distance between the housing surface and the ceramic tiles should be longer than 15mm.
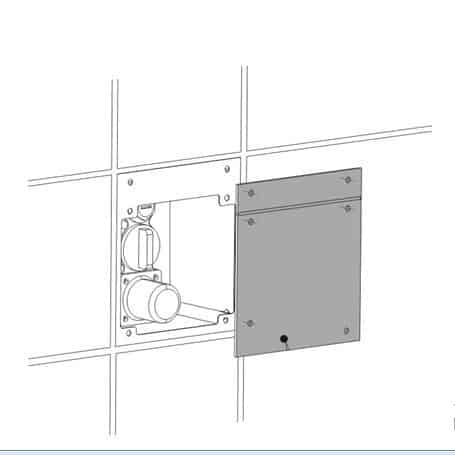
STEP2
Adjust the position of the control box, fixed with pieces of wood or other fillers. Then cover the control box by protecting board to avoid the solenoid valve be damaged when filling the cement around the control box. Finally, laying the tiles.
Notice:
The protecting board should be taken down when finished.
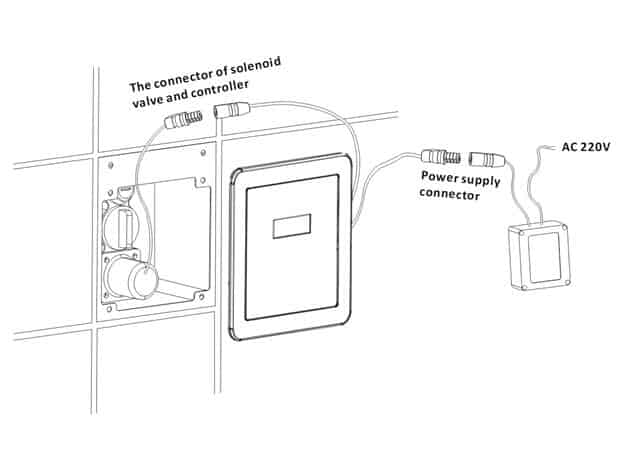
STEP3
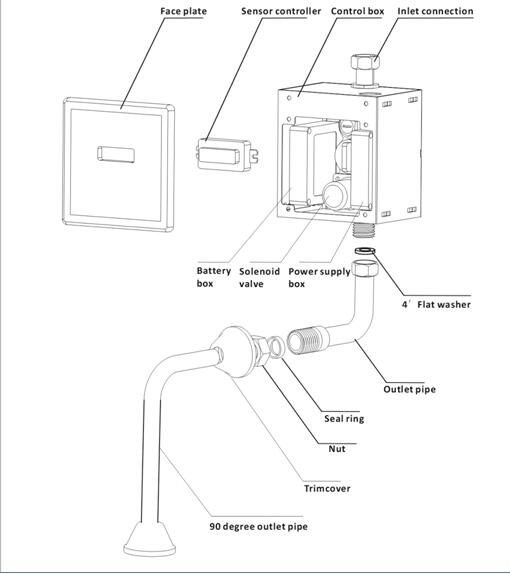
1. A wire connected to the 220V power source should be laid before placing the control box into the wall.
2. Connect the connectors as shown right, place the power supply box as figure 1 shows.
3. Connect the power supply box to the power source.
4. Fix the auto urinal flush face plate on the control box.
Notice:
Please shut off the power source during the installation.
Auto Urinal Flusher Valve Troubleshooting |
||
| Problem | Possible Reason | Suggested Solution |
| No water flow | Batteries run out | Replace batteries |
| Dirt on sensor surface | Clean the sensor surface | |
| Main water supply is shut off | Turn main water supply on | |
| Dirt on water filter net | Clean the water filter net | |
| Water pressure is not applicable | Refer to technical specification | |
| Have a continuous water flow problem | Batteries run out | Replace batteries |
| Low water pressure | Refer to technical specification | |
People who are asking more:
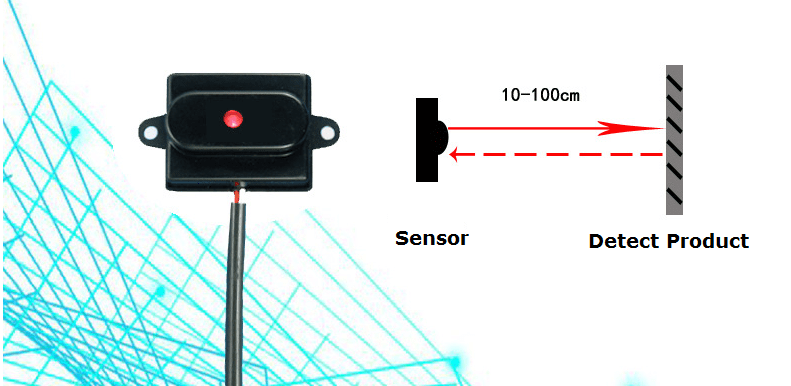
How Does automatic urinal flush valve Work?
Automatic urinal flusher uses infrared sensor technology that when you stand in front of urinal ceramic, the sensor detects and gives a pulse signal to the solenoid valve to open and give 2s pre-flush, then stop. After you leave, again 6s flush automatically. Program control all the process.
Do AUTO URINAL FLUSH need electricity?
Auto urinal flushers need electricity for sure. Both the sensor and solenoid valve works need electricity power. Normally DC: 4xAA alkaline 6V batteries.
How long do batteries last in AUTOMATIC URINAL FLUSHES?
6V with 4xAA alkaline batteries shall last approximately 3000 times/month for one year.